Understanding the aluminum extrusion process helps procurement and engineering teams catch design and manufacturability risks early, rather than tracing them back after a batch of parts has already failed. This guide walks through the full aluminum extrusion process step by step, from raw billet to finished profile, and explains what each stage can mean for quality, tolerance, and cost.
What Happens During Aluminum Extrusion
Aluminum extrusion is a hot-forming process: a heated aluminum billet is forced under high pressure through a shaped steel die, producing a continuous length of metal with a fixed cross-section. Unlike CNC machining, which removes material to create a shape, extrusion forms the profile through plastic flow in a single pass — which is why it’s the standard manufacturing process for long, repeating aluminum shapes used in automation frames, solar mounting, and equipment enclosures.
The aluminum extrusion process typically runs through eight stages: billet preparation, preheating, loading, die extrusion, quenching, stretching, cutting to length, and aging. Many of the defects that show up at the end of the line — bow, twist, dimensional drift — can be traced back to the design stage, but raw material condition, die design, extrusion temperature, speed, and post-extrusion handling all play a role as well. It’s rarely just one variable.
Step 1: Billet Preparation
Extrusion starts with a cylindrical aluminum billet — more precisely, an aluminum alloy extrusion billet — most commonly in 6061 or 6063 for structural and architectural work . Billets are cut to a length matched to the press and profile size. Incoming material should be checked against the project’s requirements for alloy composition, cast lot, and homogenization status, with supplier quality documentation on file; higher-reliability or specialized applications may call for additional internal inspection.
Step 2: Preheating
The billet is heated before extrusion, typically to somewhere in the range of 400–500°C for 6000-series alloys, though the exact billet temperature and target profile exit temperature depend on alloy, extrusion ratio, section geometry, and speed rather than a single fixed number. In general, 6063 tends to extrude comfortably at somewhat lower temperatures than 6061, which is part of why it handles thin, complex sections more easily.
Step 3: Loading the Press
The preheated billet is loaded into the container of a horizontal hydraulic extrusion press. Press tonnage requirements vary widely and should be matched to the profile’s circumscribing circle, weight per unit length, extrusion ratio, and alloy — there’s no single tonnage figure that applies across the industry. A ram then drives the billet forward against a die fixed at the front of the container.
Step 4: Extrusion Through the Die
This is the step that defines the finished cross-section. As the ram advances, pressure forces the softened aluminum through the die opening, and the profile takes shape as it exits. Extrusion speed varies considerably with alloy, extrusion ratio, wall thickness, section complexity, and exit temperature — complex, thin-walled sections generally need to run slower to keep exit temperature and surface quality under control. This is also the stage where design-side manufacturability decisions get tested for real: wall thickness balance, internal radii, and section symmetry. Sections that don’t account for these tend to show cracking, distortion, or shortened die life right here.
Step 5: Quenching
As the profile exits the die, it’s cooled — by forced air or water spray, depending on alloy and the mechanical properties required. Quenching sets the aluminum’s internal microstructure and lays the groundwork for the strengthening that happens during aging. Cooling rate needs to be matched to the section and alloy: insufficient cooling can limit the mechanical properties achievable during subsequent aging, while overly aggressive cooling on a thick or unevenly sectioned profile can introduce internal stress and distortion.
Step 6: Stretching
Cooled profiles typically go through controlled stretching to straighten them and relieve internal stress built up during extrusion and quenching. The actual stretch percentage depends on the profile, alloy, and target temper, and is generally set by the extruder’s own process controls rather than a universal figure. This stage also tends to expose section-symmetry problems from the design stage: a profile with uneven metal flow during extrusion may retain some bow or twist that stretching alone can’t fully correct — one more reason section symmetry is worth addressing at the design stage rather than counting on downstream correction.
Step 7: Cutting to Length
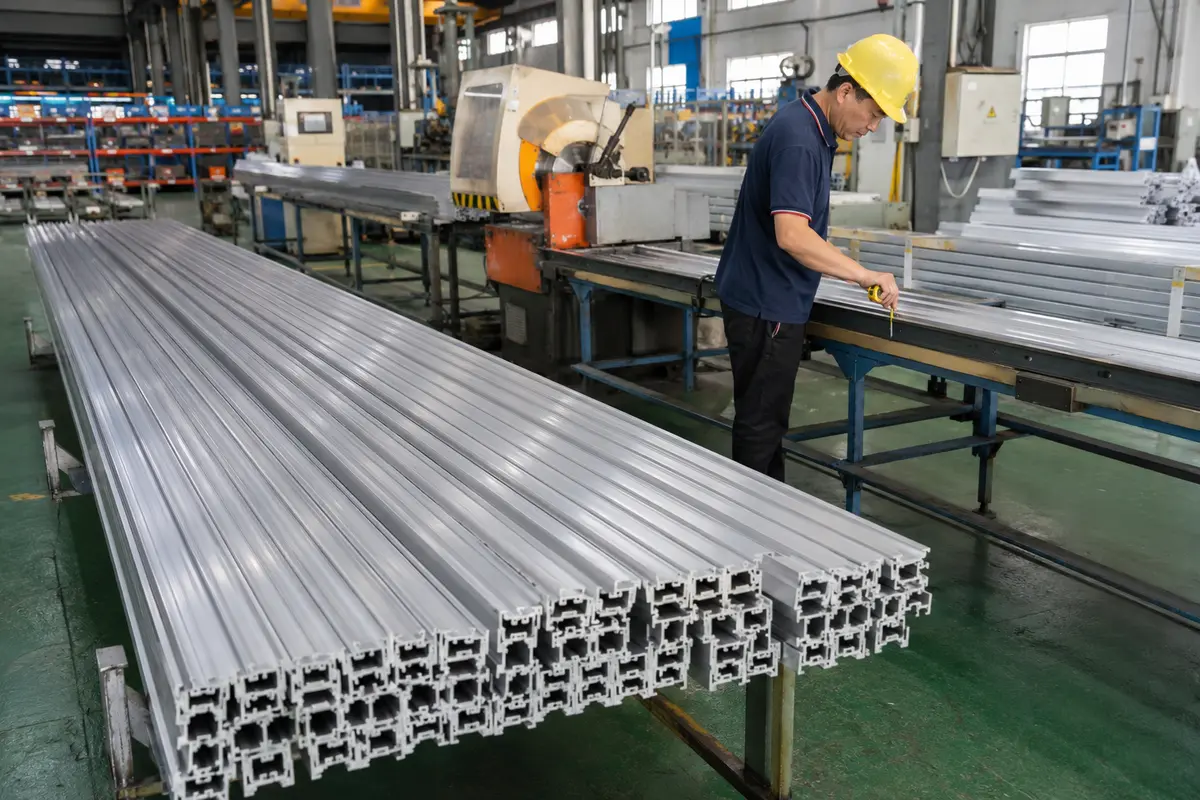
Once straightened, profiles are cut to the lengths specified in the order. Cutting allowance and length tolerance should be set based on downstream trimming, CNC processing, and the customer’s drawing requirements — saw kerf, finished-length tolerance, and secondary machining allowance are three distinct considerations, and shouldn’t be collapsed into a single fixed number.
Step 8: Aging (Precipitation Hardening)
The final step is artificial aging: cut profiles are held in an oven for several hours at a temperature and duration set for the specific alloy and target temper. It’s worth being precise here: T5 and T6 aren’t simply “6063’s temper” and “6061’s temper” — they describe different heat-treatment paths. T5 refers to material aged directly after cooling from a hot-forming process; T6 refers to material that goes through solution heat treatment before aging. Both 6061 and 6063 can be produced in T5, T6, or other tempers depending on order requirements and applicable specifications. Until aging is complete, a profile hasn’t reached its design strength — worth keeping in mind when scheduling assembly or load testing.
Process Stages at a Glance
| Stage |
Primary Variables |
Notes |
| Billet preheating |
Alloy, die complexity |
Too cool limits flow; too hot risks tearing or surface defects |
| Press tonnage |
Profile size, extrusion ratio, alloy |
Matched to the specific section, not a fixed industry figure |
| Extrusion speed |
Alloy, wall thickness, section complexity, exit temperature |
Complex thin-walled sections typically run slower |
| Stretching |
Profile shape, alloy, target temper |
Relieves stress, corrects bow and twist |
| Aging |
Alloy, target temper |
Determines final mechanical properties; temper is set by heat-treatment path, not alloy alone |
A Design Example (Illustrative)
Here’s a simplified example that illustrates how wall-thickness imbalance plays out in production: a thin-walled bracket profile was designed with a noticeable mismatch between the outer wall and an adjacent reinforcing rib. The extruded profile came out with visible bow, and stretching wasn’t enough to fully correct it. Tracing the issue back, the root cause was the wall-thickness ratio set at the design stage — once the rib thickness was increased to bring the ratio closer to balanced, subsequent trial runs showed a clear improvement. The takeaway: wall-thickness balance deserves attention at the design stage rather than being left for downstream correction. See our Aluminum Extrusion Design Guide for Engineers for more on this.
What This Means for Procurement and Engineering Teams
Every stage above is a potential source of dimensional variation, which is part of why extrusion tolerances shouldn’t be assumed to match CNC-machined part tolerances. In North America, dimensional tolerances for extruded profiles are typically determined using the applicable product specification together with the tolerance tables in ANSI H35.2 (Aluminum Standards and Data), published by The Aluminum Association. ASTM B221 serves a different purpose — it primarily specifies alloy, temper, and mechanical property requirements for extruded bar, rod, wire, profiles, and tube. The Aluminum Extruders Council (AEC) also publishes design-oriented technical resources worth keeping on hand.
Understanding the process clarifies where design decisions carry real cost and quality consequences:
- Wall thickness uniformity affects how metal flows through the die, and by extension, distortion risk during stretching.
- Internal corner radii affect stress concentration in the die and, by extension, tool life.
- Section symmetry affects how evenly a profile cools and straightens.
If you’re evaluating a supplier or reviewing a quote, it’s reasonable to ask what alloy and temper the quote assumes, what tolerance requirements apply, and whether the section has been reviewed for extrudability before tooling starts. Those questions map directly onto the process stages above and are a decent proxy for a supplier’s technical depth.
Have a project in development?
Our engineering team can help evaluate extrudability and recommend an alloy and temper before tooling begins — discuss your extrusion project with us.
 Have a Custom Aluminum Project?